Pad Making Instructions – Belted Pads

Pad Making Instructions – Belted Pads – Not all women wear underpants! This is something we tend not to think about, but in many of the situations where women would need these cloth pads, they may not have underpants to be able to wear conventional pads with. So it is worthwhile either donating underpants too (hard to judge size however, and when these wear out the pads will become hard/impossible to use)… or created belted cloth pads. We have belted pad designs which is not difficult to make, and creates a belted pad that is fully adjustable to the wearer’s size.

Pad Making Instructions - Belted Pads


The belted pad can either be a replacement for underpants – where the woman uses that to attach the cloth pads to. Or it can itself be absorbent. It is a good idea to make the belt part detatch from the pad, so that the one belt can be used for several pads/holders, so only one belt would need to be provided. The belt part can be made from elastic with adjustable buckle things (like brastraps use), or tie up ones made from wide cotton twill tape (ribbon would be slippery and not suitable). idn play

Loop End Holder
This type of belted pad has a long strip of fabric with loops on the ends (either one loop in the centre, or a loop on each corner). These loops allow a cord to be threaded through to make a belt to hold the strip of fabric in place. When worn, this cord can be tied at the waist or hip, wherever is most comfortable for the wearer. taruhan bola

Casing End Holder
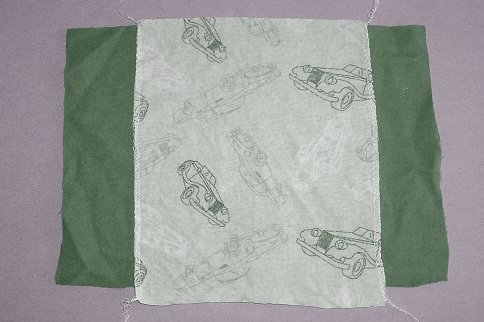
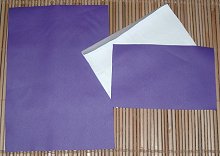
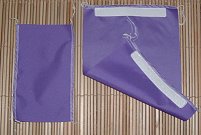
This type of belted pad has a long strip of fabric that is folded over at the ends to form a casing through wich the belt/cord is threaded. The end of the fabric is folded over and sewn down (shown in purple), forming a space where the waist cord can be threaded through. This space needs to be wide enough to easily allow this… and don’t forget that the wearer may not have access to safety pins or other methods to help them thread it though if they cannot easily do it by hand. americandreamdrivein.com

The belt would then thread through the front and back, making a similar effect to that shown on the right,

Re-purposed Bra
This type of belted pad is made from cutting up and sewing back together a bra – to make belted pad holder that has adjustable side elastics (by using the bra straps with their adjusters). So this style should be easy to use and ajust to fit not only different sized women, but also fit a woman as she grows

Pad Making Instructions - Belted Pads 1

This is a more complicated belted pad to make, but once you’ve made one and understand how it works, you should be able to make more easily.  Making a belted pad in a “Base+insert” style, means that you would make a belted base/holder that has straps or pocket ends, that hold absorbent inserts in place.
 
It could be made with loop or casing ends.

It would be recommended to make the base waterproofed (like the base + insert pads), so that 2-3 bases could be supplied with several inserts, which would provide a quick drying pad system, allowing the woman to leave the one base on during the day and change inserts as required.

“Pocket” or “All-in-One” pad
Making a pocket or AIO belted pad would mean you would make a very long, wingless pocket pad or AIO pad. As the pad would need to be changed regularly, the belt would need to be able to detatch from the absorbent pad, so that you would not need to provide several belts.


Things to think about
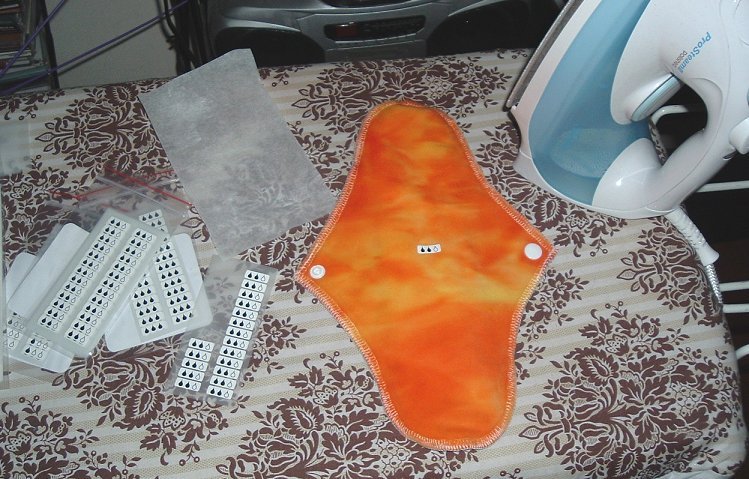
In the belted pads we have made, the sizes we have used are strips approx 40cm/16inches long, and about 7cm/2.5in wide.  This length or longer (up to 50cm/20in) would be an appropriate length for belted pads.

To some this may seem very long, but the belted holder needs to be long enough to be able to reach the waist at both front and back (remebering that at the back it has to go over the fullness of the buttocks). You could make a flared back version which would be more comfortable and covering for the wearer.

The waist belt can be made from something such as wide twill tape, or even elastic. Wider would be more comfortable for the wearer. A tie up version is recommended over an elasticated waist because it can be adjusted to fit most women, unless the elastic has a way to adjust the length, as a too loose or too tight belt will be less useful.

Pad Making Instructions – AIO Pads

Pad Making Instructions – AIO Pads – An “AIO” or “All-in-One” pad is a cloth pad that has all the absorbency and waterproofing pad sewn together. This makes a pad that is used the same way a disposable pad is. Just placed into the underpants. The advantage is that it is easy to use. The disadvantage is that they can take longer to dry, and each woman needs several of them (about 5-6 per woman, minimum)

You will find basic instructions for sewing up these pads, as well as patterns you can print off and use below. We have created a system to show absorbency of AIO pads, using iron-on labels (I purchase mine as a special order). Using 1 drop to represent light flow, 2 drops to represent medium flow and 3 drops to represent heavy flow. This way the recipient can work out what absorbencies the pads have, as well as knowing that the label side goes against the underpants. idnplay

Pad Making Instructions - AIO Pads

We also created an instruction sheet, giving information in picture form of how to wear and wash AIO pads, with our drop system of absorbency. This is useful for areas where instructions given in English may not be understood. The instruction sheet can be downloaded below, in both a single .gif format, and also as .doc file, with 6 to an A4 page. You could easily edit the image in a graphics program to remove the label if your AIO pads will not include this. judi bola

Making AIO pads
You can download basic pad pattern templates below. 2 sizes and 2 styles are provided. A set might include 2 longer and 3 shorter pads, to give the recipient different length pads should they find they need longer pads (while sitting in class or overnight etc.). These are provided as an image (.gif) with a size indication guide so you can check they print at the right scale. You can insert the image into a word processing document file and drag the image to resize it if you would like to make any alterations to the size or shape. These patterns do not include seam allowance. https://americandreamdrivein.com/

Sewing the Core
I find the best way to do the core is to cut the core fabric into a rectangle as the pattern shows, then sew that to a layer (using the winged pad shape) of flannelette with a large zigzag stitch. You can cut the corners off to make a sort of rounded end (I find this stops the corners poking up). This picture shows sewing a 2 layer hemp fleece core to a layer of blue flannel/flannelette. This blue layer will be hidden in the pad, but provides extra stability and absorbency through the pad, and also means the hemp core can be sewn on and you won’t see the stitching, so it won’t matter if it’s not exactly even or neat looking.

Pad Making Instructions - AIO Pads 1

You might want to sew your top layer to the core layer with a line of stitching down the centre, This can help show that the stitched layer is the top layer. It’s a bit easier to centre a straight line of stitching down the pad, than it is to neatly arrange the core. (This picture shows a purple flannelette top being sewn to the blue core piece)

Pad Making Instructions - AIO Pads 2

Of course you can just sew the core to the top layer of fabric, but this hidden core method is one way to do it quickly, and if you are not confident you could neatly sew the core on keeping it in the centre, then this way is definitely neater.

Then the way you make the pad depends on the method you are using.

Pad Making Instructions – Fold Up Pads

Pad Making Instructions – Fold Up Pads – A “Fold Up” pad is one that is all in one piece, but must be folded for use. Depending on the way the pad is made, the fold up part can be the top, with the winged part as the base. Or it could be that the fold up part is worn facing down, with the winged part at the top. The foldable nature of the pad allows for faster drying and cleaning. I suggest making the foldup part on the bottom and including a strip of PUL, ripstop nylon or other waterproofing.

Pad Making Instructions - Fold Up Pads

Advantages of Fold Up Pads
They are similar to an AIO pad, in that they don’t need any separate inserts that could get lost, and are fairly easy to use. They are faster drying than an AIO pad, as the fold-up part can flap freely to dry while hanging. They also use less waterproofing material than a regular AIO pad, as you can waterproof just the back strip. They can also be boosted if needed, by placing an absorbent booster/insert into the foldup section to add additional layers. poker 99

Instruction sheet
We also created an instruction sheet, giving information in picture form of how to wear and wash Fold-up pads. This is useful for areas where instructions given in English may not be understood. The instruction sheet can be downloaded below, in both a single .gif format, and also as .doc file, with 6 to an A4 page. sbobet365

There are 2 versions, one “plain”, the other has a greyed back of the foldup part, to try and represent that a waterproofed layer would be folded so that it is on the outside. www.americannamedaycalendar.com

Patterns
You can download basic pad pattern templates below. 2 sizes are provided. A set might include 2 longer and 3 shorter pads, to give the recipient different length pads should they find they need longer pads (while sitting in class or overnight etc.). These are provided as an image (.gif) with a size indication guide so you can check they print at the right scale. You can insert the image into a word processing document file and drag the image to resize it if you would like to make any alterations to the size or shape. These patterns do not include seam allowance.

Making a Fold Up Pad
First you take your winged pad shape…. cut 2 of flannel/flannelette, or if you want a heavy absorbency pad you can do one layer cotton terry and one layer flannel or cotton. Overlock/Serge/Zigzag or otherwise sew these layers together. So you basically just have a really thin pad

Then cut out a rectangle that is as long as the pad is, and 3 times wider than you want the crotch width to be when the pad is snapped. Eg the length of the smaller pad is 20cm and the crotch width is 7cm, the rectangle needs to be 20cm by 21cm. For a light absorbency pad cut 2 of flannel/flannelette, or for something heavier use 1 layer terry.

If you want PUL on the foldup part (as in this example), sew that on before you assemble the pad. That PUL strip should be the length of the fold up bit but a little less than 1/3 the width (eg in this example you’d want 6cm wide). Sew that down on the inside side (if that makes sense) – use a zigzag or other such stitch to cover the edge.

Pad Making Instructions - Fold Up Pads 1

Then sew or overlock/serge around the edges of the foldup part to finish that off.

Pad Making Instructions - Fold Up Pads 2

Then you fold the trifold section up and place that onto your winged piece, so it’s in the centre where you want it to be…. and then unfold it and pin it on (so you’re only pinning the winged part and the part of the trifold that will be sewn to it)

Pad Making Instructions - Fold Up Pads 3

Flip the pad over, and you should have this

Pad Making Instructions - Fold Up Pads 4

Now you have to sew down the centre to sew the 2 parts together. You can do this however you like… you can sew straight down the centre, or a wavy line, 2 parallel lines or a rectangle – it’s up to you. So opened out, you get something like this:

Pad Making Instructions - Fold Up Pads 5

Pad Making Instructions – Pocket Pads

Pad Making Instructions – Pocket Pads – A “Pocket” pad is a pad that is made of 2 parts. An empty “case”, “envelope” or “pocket” (Different people call it different things), with an opening on the under side, into which you can place the absorbent inserts.

Pad Making Instructions - Pocket Pads

The inserts can be made from a square of absorbent cotton terry or double/triple layer of flannel/flannelette, that can be folded into 3 to make a long thin rectangle to fit inside the pocket. Or the inserts can be elongated ovals, shaped to fit inside the pocket. poker99

Pocket pad Instructions
We have created an instruction sheet, giving information in picture form of how to wear and wash pocket pads. This is useful for areas where instructions given in English may not be understood. The instruction sheet can be downloaded below, in both a single .gif format, and also as .doc file, with 6 to an A4 page. sbotop

Making Pocket pads
You can download basic pad pattern templates below. 2 sizes and 2 styles are provided. A set might include 2 longer and 3 shorter pads, to give the recipient different length pads should they find they need longer pads (while sitting in class or overnight etc.). https://www.americannamedaycalendar.com/

These are provided as an image (.gif) with a size indication guide so you can check they print at the right scale. You can insert the image into a word processing document file and drag the image to resize it if you would like to make any alterations to the size or shape. These patterns do not include seam allowance. Each pocket pad has one full pad piece and 2 of the half back pieces.

To make a pocket pad, you will need both a pattern for the full top piece and a half back piece (which is a little wider than half a pad shape, to allow for overlap) For each pad you will need one of the top (whole) pieces and 2 of the back (half) pieces. It is recommended to make the back pieces from PUL/waterproof fabric for extra leak protection.

Pad Making Instructions - Pocket Pads 1

Edge the straight edges of the back halves (overlock/serge/zigzag or turn over and hem it), then lay the top piece down (good side down) and lay the back halves ontop of this, with the good side up. Overlock/serge/zig zag around this to sew the layers together.

Pad Making Instructions - Pocket Pads 2

Or you can lay the pieces out with good sides together, sew around it and then turn through the back opening to bring the pocket back around the right way.

You should end up with a pad that has a top layer from just one piece of fabric, and a back with 2 slightly overlapping halves. Then simply add snaps and make the inserts.

Pad Making Instructions - Pocket Pads 3

The fastest drying insert is a 3 fold insert. This is 3 times as wide as it needs to be, and is then folded into 3, to provide several layers of absorbency, but can be unfolded to dry quickly. Measure the length of the pads once completed and cut rectangles that long by 21cm wide (so they will trifold into 7cm wide) of these. Or if making inserts from terry, you could make them 14cm wide and fold in half, rather than into 3.

The user can combine several inserts to make up the absorbency they need, but as a guide 3 layers of flannel(flannelette) becomes 6 layers when folded and would be suitable for light to medium flow. One layer of terry becomes 3 layers which is suitable for medium to heavy flow. So a combination of flannel and terry inserts

Pad Making Instructions – Base + insert pads

Pad Making Instructions – Base + insert pads – A “Base and Insert” pad is a 2 part pad system where there is a “base” (usually a winged shape), that you place the absorbent part, an “insert” ontop of. Which allows the absorbent part to be changed while leaving the base on. The “insert” part can be a contoured/oblong shaped insert or a rectangle of fabric that folds up.

The inserts can be held in by “pocket” ends, where the insert is kept in place because the ends are tucked into little flap/pockets at the ends of the pad, or bands/straps of ribbon or other such thing (see below example), where the insert is placed under the bands to keep it in place. pokerasia

Personally I feel the most practical way of making these is to have a waterproofed base of PUL or ripstop nylon, topped with microfleece, with strap ends, and absorbent rectangle “trifold” (fold into 3) inserts. sbobet88
 
The base is then leakproof, and won’t absorb any blood that flows through the inserts, so it can be reused when the insert is changed. The strap ends allow for greater adjustability and can more easily handle 2 inserts than the pocket ends. Longer inserts can also be worn if needed. www.mrchensjackson.com

Where an “All-in-one” pad set would need to be at least 5 pads per girl/woman to be useful, a waterproofed base + insert style pad can allow the inserts to be changed frequently while the same base is worn, meaning less bases are required (2-3), which reduces the amount of waterproofing fabric (which is often expensive) needed. Which is why I believe waterproofed versions would be more practical, as they can be worn longer.

Benefits of this style are:

  • A girl/woman could have 2 or 3 bases and about 6 inserts. So less of the more expensive waterproofing fabric is needed than in making a set of AIO pads.
  • If the bases are made from non-absorbent fabrics they dry quickly. The inserts can be washed separately so they are faster drying, particularly if they are the fold-up kind.
  • If extra absorbency is needed, 2 inserts can be worn at the same time, allowing a women to adjust the pad to her needs.
  • A version with straps allows the woman to position the insert further forward or back if she needs extra coverage, and longer inserts can be used in them, as they are free to overhang the pad base (the pocket ends need inserts exactly the right length)
  • If additional inserts are needed, other fabric sources may be available, such as old clothing, which would not make absorbent pads on their own without the waterproofed base.

Instruction sheet
We also created an instruction sheet, giving information in picture form of how to wear and wash Insert pads. This is useful for areas where instructions given in English may not be understood. The instruction sheet can be downloaded below, in both a single .gif format, and also as .doc file, with 6 to an A4 page.

Making Base + insert pads
You can download basic pad pattern templates below. 2 sizes are provided and 2 different shapes. A set might include 2 longer and 3 shorter pads, to give the recipient different length pads should they find they need longer pads (while sitting in class or overnight etc.). These are provided as an image (.gif) with a size indication guide so you can check they print at the right scale. You can insert the image into a word processing document file and drag the image to resize it if you would like to make any alterations to the size or shape. These patterns do not include seam allowance.

Suggested Fabrics:
Waterproofing – PUL, ripstop nylon or other waterproof or semi-waterproof fabric
Topping – Microfleece, polarfleece, suedecloth or other synthetic fabric
Inserts – anything absorbent, such as terry, natural fleece or flannel/flannelette
Straps – Ribbon, cotton “twill” tape, strips of fabric, bias binding etc. (Some people use rickrack, while others complain that this can curl and be uncomfortable)

Pad Making Instructions - Base + insert pads 2

This shows a white PUL backing, Orange fleece top, with 2 pocket ends

Sewing them up:
Cut out a layer of the backing fabric (eg PUL/ripstop nylon) and a layer of the topping fabric (eg microfleece) and measure and cut 2 straps or 2 pocket ends. If making the pocket ends, duplicate the end of your pad pattern, to the line marking where the straps go. Pin the backing and top layers together and prepare the ends you plan to use

Strap version
Place the straps towards the ends of the pad, as marked on the pattern. You might find it’s helpful to pin or stickytape the straps into place.
 
Then overlock/serge/zigzag or sew bias binding or FOE all around the pad base to sew all the layers together and finish off the edges nicely.

Pocket-end version
Cut out the pocket ends. You can overlock/serge, or otherwise bind (such as using bias binding or a zigzag stitch) the straight edges of the pocket ends if they will fray, but if using microfleece it won’t fray so you can just leave them. Microfleece also has the advantage of being stretchy, so it is easier to fit the inserts in. Position the pocket ends in place on the ends of the pad (You may like to pin or stickytape them in place).
 
Overlock/serge all around the pad base to sew all the layers together.

The fastest drying insert to make is a 3 fold insert. This is folded into 3, to provide several layers of absorbency, but can be unfolded to dry quickly. To work out what size you need to make, measure the length of the pads once completed (eg 26cm) and make rectangles that are as long as the pad is, by 21cm wide (which makes a 7cm wide when folded in 3). Of if making terry inserts you could make them 14cm wide and have them fold in half for use, instead of in thirds (as the terry is more absorbent).

The user can combine several inserts to make up the absorbency they need, but as a guide 2 layers of flannel(flannelette) becomes 6 layers when folded and would be suitable for light to medium flow. One layer of terry becomes 3 layers which is suitable for heavy flow. So a combination of flannel and terry inserts would be good.

If you want to make pocket ended bases, you will want to make the inserts so that they can easily fit into the pockets. To do this, you need to cut 2 pieces of flannel in different sizes. Make one about an inch shorter than the other one. Overlock/serge or edge the shorter piece, then sew this onto the bottom piece.

Pad Making Instructions - Base + insert pads 1

Then you can overlock/serge all around the insert to edge it

Pad Making Instructions - Base + insert pads 3

This means that when the insert is folded, it’s only single layer in the section that will be slipped into the pocket ends, yet double layer where it is needed

Pad Making Instructions - Base + insert pads 4

Wetbag

Wetbag – A “wetbag” is the name for a pouch/bag that can be used to place used pads into. While the name may seem to mean it could hold water, the idea is simply that it is made from a fabric that will contain any odour and if the pads are wet with blood, there will be no leakage.

PUL, vinyl, plastic tablecloth material, or a thick polyester/nylon fabric (or double layer nylon) would be suitable. Even a PVC pencil case would be appropriate for a wetbag. poker asia

Ideally, a wetbag should be provided with any cloth pad donation kit. This allows the recipient to carry a clean pad in the bag with her to work/school, and provides somewhere to store the used pad, when pads are changed during the day. sbobet

If you are making pads to donate, this guide will show you how to make a very basic 2 compartment wetbag. This guide uses 1 large piece of PUL, but if you are working with smaller amounts, you could make it with a bottom seam and use smaller pieces. https://www.mrchensjackson.com/

Step #1

Take a piece of paper. What we’re going to be doing is making an envelope type shape as shown. So fold your paper (almost in half, but with a top flap). We will be needing one piece of fabric the whole piece of paper size, and one a little shorter than the folded size. This makes a reasonable size wetbag, you could reduce the size to even half as wide (which would conserve fabric)

Wetbag

Step #2

Cut out your pieces of waterproof fabric, So that you have your full piece of paper size. If you want to make a divider inside, so that both clean and used pads can be stored in the same bag, you will need one piece the same size as your folded envelope of paper.

Wetbag 1

Step #3

If you have an “overlocker” or “Serger”, finish the short edges of the large piece, and the long edges of the smaller piece. If you don’t have an overlocker/serger, you could “zigzag” it… or you’ll have to make this wetbag in a “turn and topstitch” method (which isn’t covered in this guide). Then sew some velcro on both short ends of the long piece as shown (make sure you have one piece on the right side of the fabric and one piece on the wrong side!). Hint – If you cut the corners off the velcro, it’s not sharp and pokey 🙂 You could use snaps instead.

Wetbag 2

Step #4

Lay the short piece ontop of the longer piece, leaving a little space below the velcro. The bottm of the small piece should be along the fold line that you would fold the large piece up. If you would like the compartments of the wetbag to be completely separate, sew the bottom of the short piece down. If not, then leave it as is, and the small piece then becomes a divider, rather than a contained pocket.

Wetbag 3

Step #5

Fold the bottom part of the large piece of PUL up, so that it meets the top edge of the smaller piece.  You should now see the form of the wetbag. You can pin this together to keep it straight.

Wetbag 4

Step #6 Now just overlock/serge down each side, sewing the layers together

Wetbag 5

or…

A quicker and easier version that doesn’t require velcro. You can fold the flap down and overlock/serge it straight down the sides – so you are sewing the flap down at the sides at the same time. Then you can place a snap (or velcro dot) in the centre to help keep it closed in the centre when it’s full (the snap is hard to see in this picture because the colour matches the PUL too well). This uses less velcro/snaps, and the flap stays closed at the edges due to being sewn down

Wetbag 6

Step #7

To finish off your threads, take a large needle, thread it through the stitches, and then poke the thread through the eye. Pull it through, and then cut off the excess

Wetbag 7
Wetbag 8

Underpants

Underpants – An unusual topic you may think, but one that needs to be discussed.

Most women in western society wear underpants (knickers, panties – whatever you call them). These are “normal” for us. However it may surprise you to know that underpants in this form have only been around since about the 1920s to 1930s. Before then women would wear loose fitting crotchless “bloomers”, and before then, nothing at all. See the underwear section of the Museum of Menstruation for more information on the history of undergarments.

Underpants


So, in many countries where menstrual product donations would be needed, they may not have underpants either. This may not be because they cannot afford underpants, but may be because the western tradition of wearing such garments is not “normal” for them. idnpoker

Usually donations of menstrual pads need to be accompanied with donations of underpants as well. This however is problematic, as underwear must be correctly fitting to be useful with pads (particularly cloth pads), and it is impossible to be able to correctly fit every woman if the underpants aren’t specifically sized for them. https://www.benchwarmerscoffee.com/

The solution to this could be to provide belted pads instead, or at least to provide some underpants with your pad donations. premiumbola

If providing underpants, you may like to consider making your own underpants that use a “string bikini” style. That is a style comprised of 2 triangles joined at the crotch, but with sides that tie up. www.benchwarmerscoffee.com
 
This allows the sides to be tied to a point that ensured a correct fit for any sized woman, and can be adjustable as she ages or weight changes. As well as providing the needed coverage that allows pads to be worn.

Donating Menstrual Cups

Donating Menstrual Cups – Often women ask why agencies aren’t providing menstrual cups to women instead of cloth pads or disposable products. Menstrual cups are small, so won’t take up as much space in donation shipments. They don’t require underpants, and can be worn for longer lengths of time. They don’t produce waste, can be more easily cleaned than cloth pads.

On the surface it does seem like a much better idea. But there are some other points to consider. They will break the hymen, and this would not be appropriate for many cultures. They can more easily introduce bacteria and infection into the vagina if they are not properly cleaned (remembering that clean drinking water is not as easy to come by in the types of areas these products need to go). idn poker

Donating Menstrual Cups


They can take time to get the hang of, and these women will not have access to internet support groups. Some women find a particular brand of cup does not work well for them, so need to try other cups – this would not be possible in a donation situation. Cups come in 2 sizes, even if only one particular age group was targetted, they may only be able to use that size for a few years. https://www.benchwarmerscoffee.com/

While we don’t like to think about it, there is also the other (though hopefully less likely) reason cup use would not be possible, and that is infibulation (female genital operation where the labia is sewn closed to cover the vaginal opening). https://www.benchwarmerscoffee.com/

Also when cloth pad donations are sent to countries as part of aid packages, these are often donated by women sewing cloth pads specifically for this purpose. And purchasing menstrual cups would not be an affordable option for them. https://www.benchwarmerscoffee.com/

In situations where it is possible to donate menstrual cups, and their safe use could be appropriate, this could however be a very useful alternative to pads or tampons.