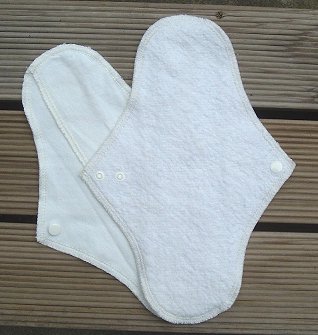
Pad Making Instructions – Pocket Pads – A “Pocket” pad is a pad that is made of 2 parts. An empty “case”, “envelope” or “pocket” (Different people call it different things), with an opening on the under side, into which you can place the absorbent inserts.

The inserts can be made from a square of absorbent cotton terry or double/triple layer of flannel/flannelette, that can be folded into 3 to make a long thin rectangle to fit inside the pocket. Or the inserts can be elongated ovals, shaped to fit inside the pocket. poker99
Pocket pad Instructions
We have created an instruction sheet, giving information in picture form of how to wear and wash pocket pads. This is useful for areas where instructions given in English may not be understood. The instruction sheet can be downloaded below, in both a single .gif format, and also as .doc file, with 6 to an A4 page. sbotop
Making Pocket pads
You can download basic pad pattern templates below. 2 sizes and 2 styles are provided. A set might include 2 longer and 3 shorter pads, to give the recipient different length pads should they find they need longer pads (while sitting in class or overnight etc.). https://www.americannamedaycalendar.com/
These are provided as an image (.gif) with a size indication guide so you can check they print at the right scale. You can insert the image into a word processing document file and drag the image to resize it if you would like to make any alterations to the size or shape. These patterns do not include seam allowance. Each pocket pad has one full pad piece and 2 of the half back pieces.
To make a pocket pad, you will need both a pattern for the full top piece and a half back piece (which is a little wider than half a pad shape, to allow for overlap) For each pad you will need one of the top (whole) pieces and 2 of the back (half) pieces. It is recommended to make the back pieces from PUL/waterproof fabric for extra leak protection.

Edge the straight edges of the back halves (overlock/serge/zigzag or turn over and hem it), then lay the top piece down (good side down) and lay the back halves ontop of this, with the good side up. Overlock/serge/zig zag around this to sew the layers together.

Or you can lay the pieces out with good sides together, sew around it and then turn through the back opening to bring the pocket back around the right way.
You should end up with a pad that has a top layer from just one piece of fabric, and a back with 2 slightly overlapping halves. Then simply add snaps and make the inserts.

The fastest drying insert is a 3 fold insert. This is 3 times as wide as it needs to be, and is then folded into 3, to provide several layers of absorbency, but can be unfolded to dry quickly. Measure the length of the pads once completed and cut rectangles that long by 21cm wide (so they will trifold into 7cm wide) of these. Or if making inserts from terry, you could make them 14cm wide and fold in half, rather than into 3.
The user can combine several inserts to make up the absorbency they need, but as a guide 3 layers of flannel(flannelette) becomes 6 layers when folded and would be suitable for light to medium flow. One layer of terry becomes 3 layers which is suitable for medium to heavy flow. So a combination of flannel and terry inserts
